10-Minute App - Windows Phone 7 App
Filed under: #daxmusings #bizapps
This is the third and final article in a 3-post about the Windows Phone 7 app for AX 2012. Before we continue on I think it’s import to re-iterate that this is a proof-of-concept and you should not take this code as a basis to make a real world app. The goal is to show the potential and relative ease of making AX 2012 work with the rest of the Microsoft technology stack. That being said, if you missed the first two articles:
In this final article, we’ll build the actual Windows Phone 7. You need to have the setup and code in place of the first two articles. Before we get started, make sure you have the WCF service that we created in Part 2 running (press F5 in Visual Studio), and make sure you have the Windows Phone 7 SDK installed.
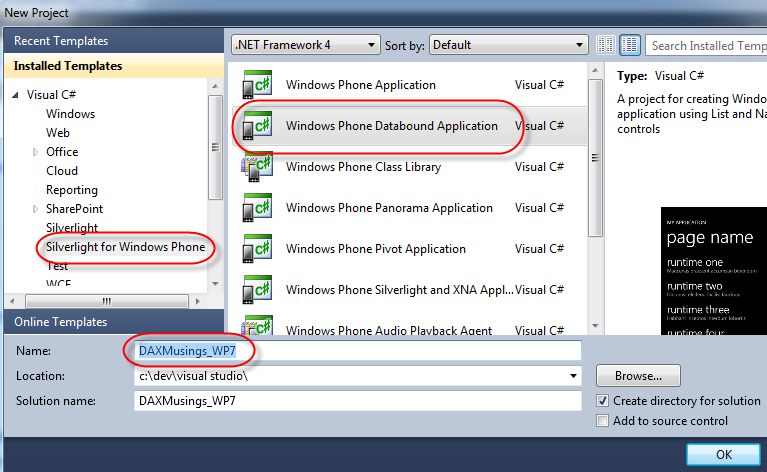
So, with the WCF service running, open a SECOND instance of Visual Studio 2010, this one does not need to run as administrator. Create a new project of type “Silverlight for Windows Phone and select the “Windows Phone Databound Application” template. I’m calling this project “DAXMusings_WP7”.
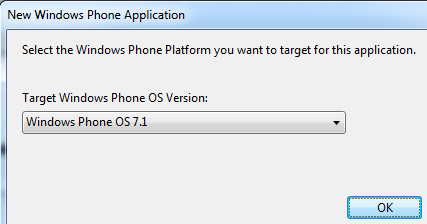
You will get a dialog asking what version of the OS you want to use. The current version as of this writing is 7.1, which is Mango. I know it’s confusing, I thought Mango was 7.5, but 7.1 is what it is. If you are a time traveler from the future reading this old blog post from November 2011, feel free to use a newer version. We’re not using any specific OS features, so as long as .NET still supports WCF when you’re reading this, I’m suspecting this code will still work :-)
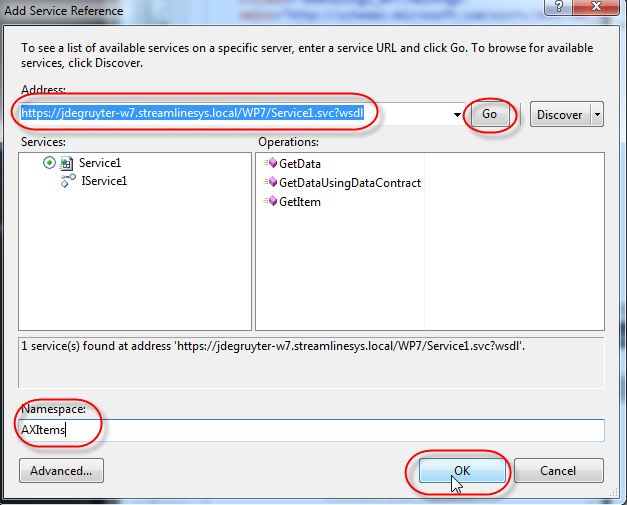
First thing we need to do is add the service reference to our WCF service. This goes back to article 1 and 2. You NEED to enter the FULL qualified domain name for your server (the server name needs to match the certificate created in part 1), and you need to know the path to your service. If you’ve followed my lead on naming of the classes and folders etc, then (except for the server name) your URL should be:
https://yourmachinename.domainname/WP7/Service1.svc?WSDL
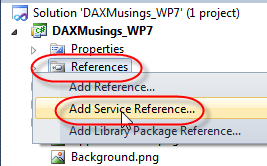
obviously replacing the “yourmachinename.domainname” with your server’s FQDN. To add the reference, right-click the “References” node and select “Add Service Reference”. On the dialog, enter the URL to your service’s WSDL and click GO. In the namespace, I called the reference “AXItems”.
The default layout defined in the XAML file contains a grid with two rows: one for the application and page title, one for the actual content grid. We’ll add a third row to go in between, where we can enter a user name and have a button to retrieve the data. In the XAML file, add a third “RowDefinition” in between the two existing ones, with Height set to “Auto”, so it looks like this:
Click here for a full code screenshot<pre>        <Grid.RowDefinitions>
            <RowDefinition Height="Auto"/>
            <RowDefinition Height="Auto"/>
            <RowDefinition Height="*"/>
        </Grid.RowDefinitions>
</pre>
Next, under the StackPanel node containing the application title and page title (you can change the TEXT attribute on those TextBlock nodes to change the title that will show in your app… for example, change it to “DAXMusings Rules”) and before the Grid called ContentPanel, we will add the following XAML. Since we’re adding a Row in between, we need to make sure the Grid.Row property of contentpanel below is changed to 2! (see the full screenshot)
Click here for a full code screenshot<pre>        <StackPanel x:Name="LogonPanel" Grid.Row="1">
            <TextBox x:Name="Logon" Text="[email protected]" /%gt;
            <Button x:Name="GetItems" Click="GetItems_Click">
                <TextBlock Text="Get Items" />
            </Button>
        </StackPanel>
</pre>
The keen eye noticed that the logon TextBox I added contains a username already ([email protected] - the user we setup in the trusted intermediary article). Obviously this is not something you want to do in your production app. However, the Windows Phone Emulator (or at least the current version of it) does not support your machine’s keyboard, so you actually have to use the on-screen keyboard for testing. So putting it in here saves you some typing. This is also a good moment to remind you this article series depends on the trusted intermediary setup, so you need to go through that for this to work.
If the hard-coded user was caught by your left keen eye, then your right keen eye may have noticed there is an event handler for the “Click” event on the button. If you are typing this in manually, the Visual Studio editor will prompt you to add that event handler method. If you just copy/paste the code from above, you can right-click the GetItems_Click text and select “Navigate to Event Handler” and this will create the method for you.
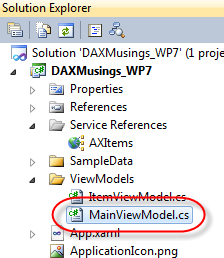
Before we can actually do something, we’ll have to add the code that actually makes the call. There is already some basic code added for that in the template, but we want to change that of course. In your solution explorer, open the “ViewModels” folder and double click the “MainViewModel.cs” file.
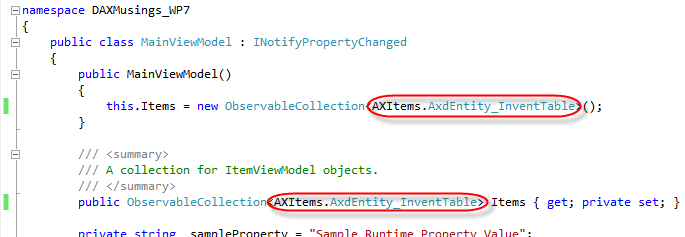
The grid on the main page uses the Observable Collection that is defined in this file. In the template, they define a new data structure. We want to actually just use the data structure returned from the WCF service. So we’ll need to make some changes to use the AXItems.AxdEntity_InventTable as the class contained in the collection:
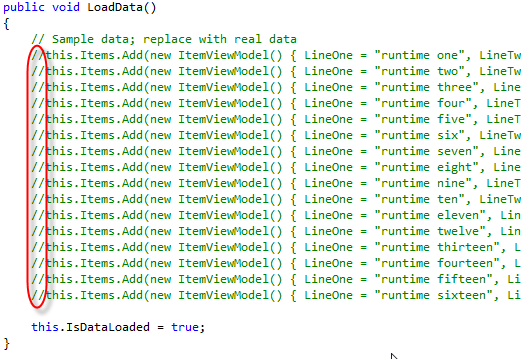
You will notice that there is a method in this file called “LoadData”, which due to this change will now contain a bunch of error lines. Just remove the error lines or comment them out:
Next, we’ll add a method at the end of this MainViewModel class, which will be used as the event handler when the results are received from our WCF app. First we’ll make sure there were no errors, if there were we will show that in a popup, and return out of the method. Next, we check to see there were items in the result set, if not we say so and return out of the method. Lastly, we loop over the items that were in fact returned, and add them to our observable collection. The isdataloaded=true is not really necessary, it’s a variable maintained by this template but it doesn’t really do much anyway.
Click here for a full screenshot<pre>void client_GetItemCompleted(object sender, AXItems.GetItemCompletedEventArgs e)
{
    if (e.Error != null)
    {
        Exception ex = e.Error;
        MessageBox.Show(ex.Message);
        return;
    }
    if (e.Result == null)
    {
        MessageBox.Show("No items found");
        return;
    }
foreach (AXItems.AxdEntity_InventTable item in e.Result)
{
    this.Items.Add(item);
}
this.IsDataLoaded = true; }
</pre></code>
Finally, we’ll add the actual code that makes the call. As mentioned a few times in this article series, the authentication is not what it should be and you should do proper WCF authentication.
Click here for a full screenshot<pre>public void GetItems(string username)
{
    this.Items.Clear();
try
{
    AXItems.Service1Client client = new AXItems.Service1Client();
    // Set the client credentials property here for proper authentication
    client.GetItemCompleted += new EventHandler<AXItems.GetItemCompletedEventArgs>(client_GetItemCompleted);
    client.GetItemAsync(username, "10000", "10005");
}
catch (Exception ex)
{
    MessageBox.Show(ex.Message);
} }
</pre></code> Another thing here is the hard coded item numbers range. We’re basically getting items 10000 through 10005. Feel free to add these as parameters on the XAML file as well. However, you need some type of limitation or you will run into the maximum message size of your WCF service. These can be changed easily in the web.config settings of the WCF service if you wish to do so. However, since we’re doing a quick prototype here we’re using mostly standard settings and a standard service too. Remember this service actually returns ALL item data, not just a few fields. Ok, so now that we have the WCF call in place, we just need to call this method from our button click event handler. You should still have MainPage.xaml.cs open, so click on that tab.
in the GetItems_Click method, we now call our new method GetItems, which was put in the main view model. We need to pass the username entered on the screen. The textbox we added we gave the x:Name=”Logon” name, so we can just call that and retrieve its property “Text” to pass to our method as the username:
<pre>private void GetItems_Click(object sender, RoutedEventArgs e)
{
    App.ViewModel.GetItems(Logon.Text);
}
</pre>
Almost there! The last thing we need to change is back in the MainPage’s XAML file:
Now that we have changed the observable collection (“Items” - which is what you see in the XAML the grid’s ItemsSource property is bound to), we need to make sure the two TextBlocks in the data bound grid actually bind to properties that exist on the AXItems.AxdEntity_InventTable class. This is the class AIF returns from the service, and the properties on it basically reflect the fields on the InventTable. In fact, it also contains some sub-tables of InventTable, so feel free to experiment with the binding. For now, we’ll just bind the two text blocks to item id and name alias (“search name”):
Click here for a full screenshot<pre><TextBlock Text="{Binding itemIdField}" TextWrapping="Wrap" Style="{StaticResource PhoneTextExtraLargeStyle}"/>
<TextBlock Text="{Binding nameAliasField}" TextWrapping="Wrap" Margin="12,-6,12,0" Style="{StaticResource PhoneTextSubtleStyle}"/>
</pre>
With all this in place, we’re ready to run the App!! Now, one thing to remember from Part 1 was the self-signed certificate issue with Windows Phone 7. Remember that to resolve this issue we added a ZIP file called certificate.zip onto the IIS website in the root folder. Press F5 to run and deploy the app to the phone emulator. Make sure the emulator is selected and it doesn’t try to deploy using Zune software (in case you actually have a windows phone or a zune player perhaps).
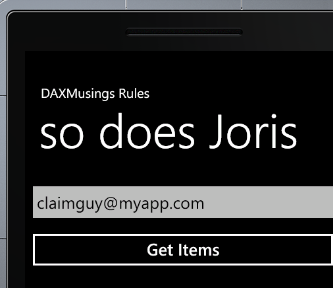
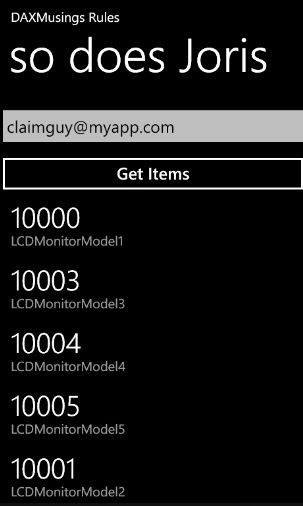
Ok, so when the emulator opens, it will load all the assemblies and then open your app, which should look like this:
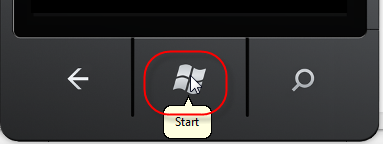
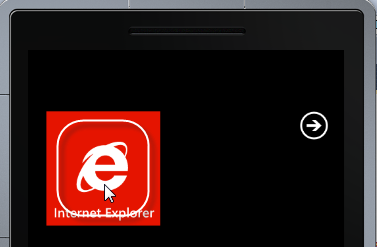
Feel free to click the “Get Items” button, but you will get the “endpoint not listening” error (see Part 2 for explanation). So use your mouse to click on the Windows button. Once in the main menu, open internet explorer.
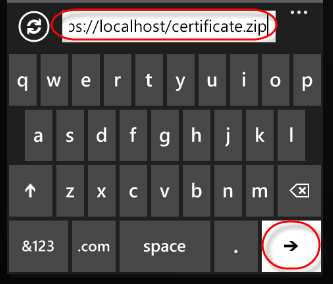
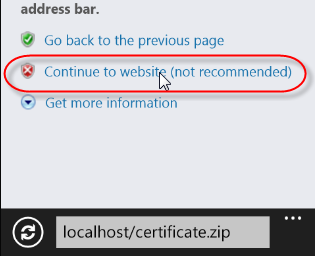
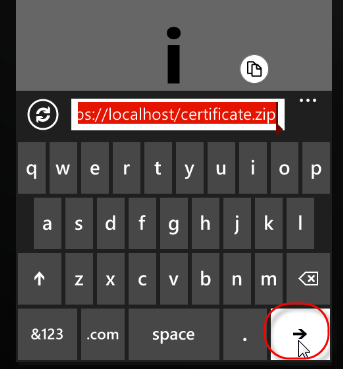
In internet explorer (after click away the privacy notice from Microsoft), click the URL bar at the bottom and type in the URL of the certificate.zip file. Now, I will save you some typing (clicking - since the windows keyboard doesn’t seem to be supported) here. For development purposes, the windows phone emulator re-routes “localhost” to your computer running visual studio, rather than localhost being the windows phone device itself. So, to get to the certificate, if you followed the naming of my articles, the URL should be https://localhost/WP7/certificate.zip (don’t forget the “S” at the end of https). Click the white button with the arrow on it. You will get a warning from IE and just click continue.
When I do this the first time, I get an error “can’t download the file”. If someone can explain why this is, feel free to leave a comment. In any case, if you click the URL bar at the bottom again, it will pop up with the URL still in it, and if you hit the white arrow again, it will actually work… (not sure what this is all about)
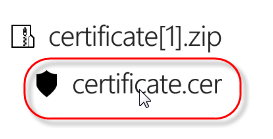
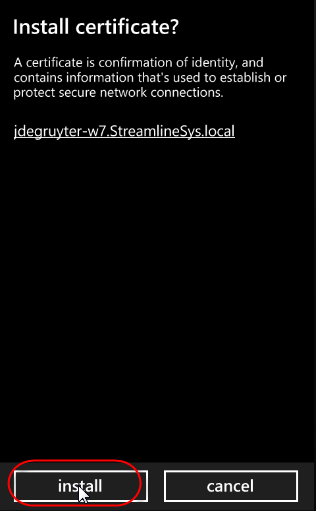
This will open the ZIP file on screen, and will show you the certificate.CER file contained within. Click the CER file, and you will be prompted with the details. Click the “Install” button at the bottom. This will confirm it’s installed, just click OK.
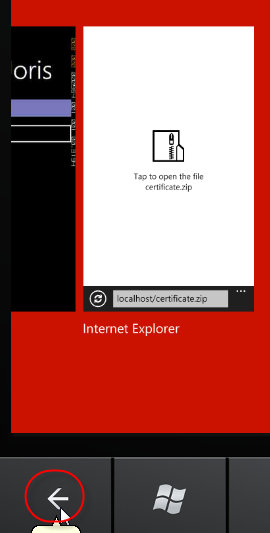
Once this is done, click and HOLD the back button at the bottom. This will bring up the task switcher. Click on your APP (you can swipe the screen to get to it) and this will switch back to your app.
Back in your app, you can now click the “Get Items” button, and after a few seconds it should display your item numbers 10000 through 10005 (assuming you have those, remember we hardcoded the range). If your app doesn’t react to clicks on the username field or the item button, make sure you have set the Grid.Row property of the Grid/ContentPanel to “2”. Else you have two overlapping controls and it gets stuck basically (guess how I know this).
A word of advice. If you close the emulator screen, you will LOSE the certificate installation and have to repeat the process every time. So rather than closing it, go to Visual Studio and STOP debugging to close the app. Next time you wish to run your app, just hit F5 again, and the emulator will just pop back up. But if you close it, you’ll have to reinstall the certificate.
So (63 screenshots and some sleep deprivation later) that concludes our Windows Phone 7 app. Your mileage may vary on the development being 10 minutes, but at least the intent was there. And the windows phone app itself was probably about 10 minutes, no? :-) The setup and potential pitfalls is what makes this tough.
Hope you enjoyed this one, I know I did (once it was working!). Please drop me a line on my blog and let me know if you have this running, if you have feedback of any kind.
There is no comment section here, but I would love to hear your thoughts! Get in touch!
Blog Links
Blog Post Collections
- The LLM Blogs
- Dynamics 365 (AX7) Dev Resources
- Dynamics AX 2012 Dev Resources
- Dynamics AX 2012 ALM/TFS
Recent Posts
-
GPT4-o1 Test Results
Read more... -
Small Language Models
Read more... -
Orchestration and Function Calling
Read more... -
From Text Prediction to Action
Read more... -
The Killer App
Read more...
 Menu
Menu
