Trusted Intermediary in AIF Services
Filed under: #daxmusings #bizapps
The use of WCF as the platform for AIF in AX 2012 makes integrating relatively simple. Most recent products and programming languages support SOAP or REST services, or Odata. There is one big catch with the services in AX however… users need to be authenticated by an active directory! Obviously, this is a stumble block when considering mobile devices or cloud connections… Active Directory (AD) is usually hosted on premise behind a firewall, mobile devices probably don’t support AD authentication, and AX AIF does not support basic HTTP authentication. On top of that, in case of public services, you wouldn’t want to have to add every single user to your active directory! Fortunately, AX 2012 supports a new model, which is used for both AIF and EP, called the Trusted Intermediary.
The phrase “trusted intermediary” means you indicate that for a particular service you trust certain users or user groups enough that you allow them to impersonate another user. Basically, you trust the intermediary to have done the user authentication instead of AX. This opens up the possibility of authenticating users in your own app and, if successful, call into AX as a trusted intermediary user and run code as that authenticated user. For example, if you are building a Windows Azure site or service, you can use the built-in Azure frameworks to authenticate users against LiveId, OpenId, etc. Once authenticated you can pass that user’s ID to AX and AX will assume that you, as the trusted intermediary, have successfully authenticated and verified the user’s identity.
One could now ask, why would you need all of this? Can’t we just have one valid user in AX and run our service as that user? Well of course that works, but you would not have any of the AX security features available. Basically, your intermediary user in such a case would need administrator privileges (to support any and all requests that it could possibly get), and then YOUR intermediary service would need to filter out actions or data that the end user is not supposed to see. A lot of work, and lot of potential for security holes in your own app. With a trusted intermediary impersonating another user, AX can use the impersonated user’s AX security settings and enforce them, including XDS for example!
Of course the term intermediary implies there is something in between the end user and AX. When building a website, this is obvious, the website (which can run in an application pool identity that is a trusted intermediary) can impersonate the end user and is the intermediary between user and AX. This is how Enterprise Portal on SharePoint 2010 works with claims users. For AIF however, what does this mean? Well, it means you would need to build a service in between AIF and your end user or consuming app. We will cover the code for that in a follow-up article. In this article, I will show you how easy it is to set this up, and how to then consume this service with impersonation.
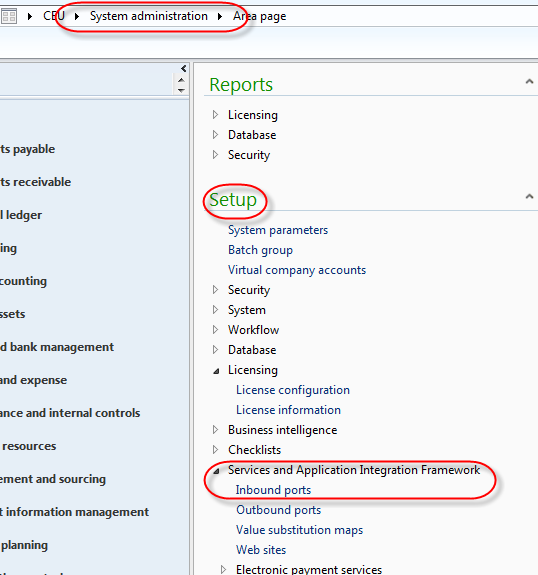
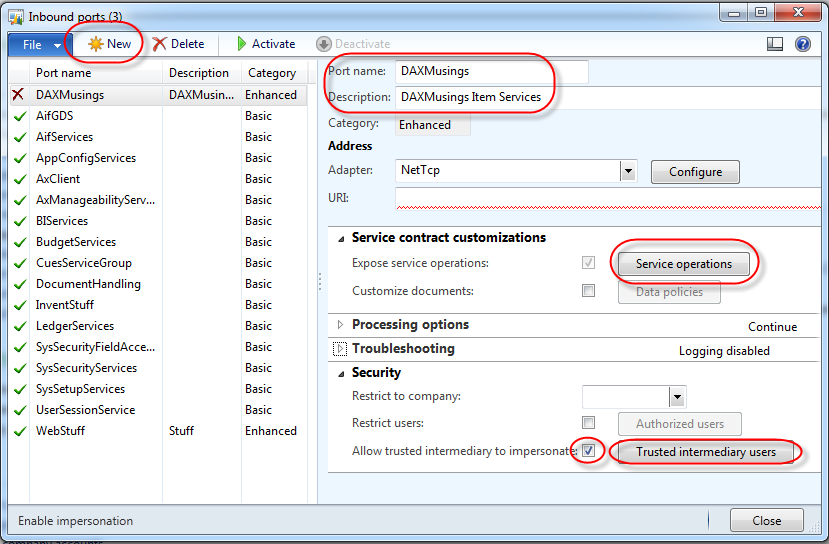
For once we will not be going into the developer workspace of AX. All we need to do is some basic setup for AIF. We’ll create an enhanced port, add some service operations, and select an intermediary user. We’ll use NETTCP so we won’t need the AIF IIS components installed. Open the inbound port definitions in the AX menu under System Administration > Setup > Services and Application Integration Framework > Inbound ports.
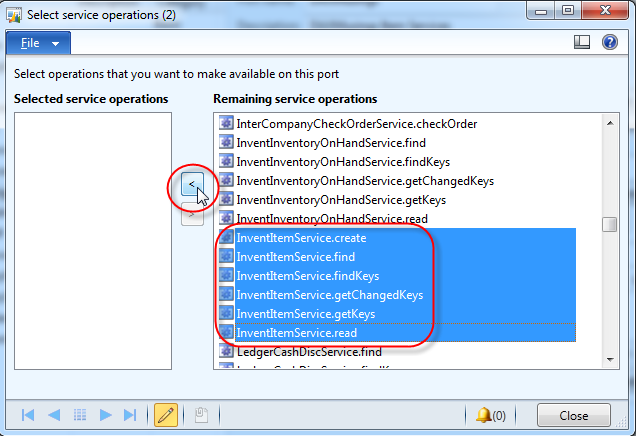
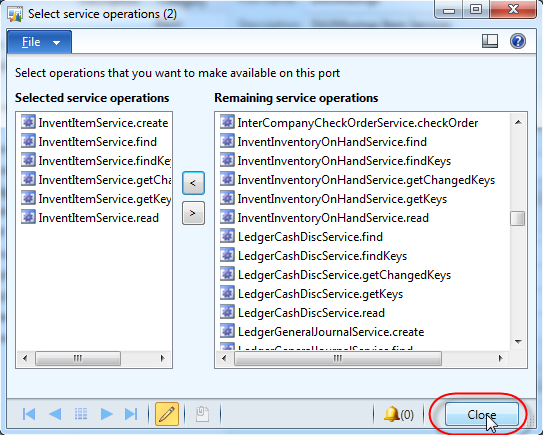
Click the NEW button to create a new enhanced port, and give it a name and description. Click on the “Service operations” button. Find the operations that start with “InventItemService.” and add then all to the list of operations for your port by clicking the “<” button in the middle. Close the screen. <div class="separator" style="clear: both; text-align: center;">
 </div><div class="separator" style="clear: both; text-align: center;">
 </div><div class="separator" style="clear: both; text-align: center;">
 </div>
Back on the inbound port screen, check the “Allow trusted intermediary to impersonate” and click the button that becomes available called “Trusted intermediary users”. For the purpose of this article, select “User” as the user type, and select your current user.
Click close on the intermediary users screen. Under the troubleshooting fast tab, enable “Include exceptions in fault”. This will output AX exceptions into the service exception, so your consuming app will actually get the AX exception message (such as “access denied” or any other exception that may get thrown). You can also enable logging if you want, I set my logging mode to “All document versions”.
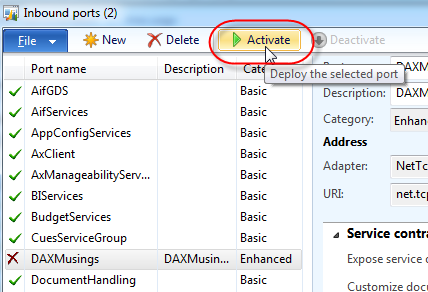
As far as the inbound port is concerned, everything is done. Click “Activate” to activate this new port. This will generate the necessary IL code and enable the port.
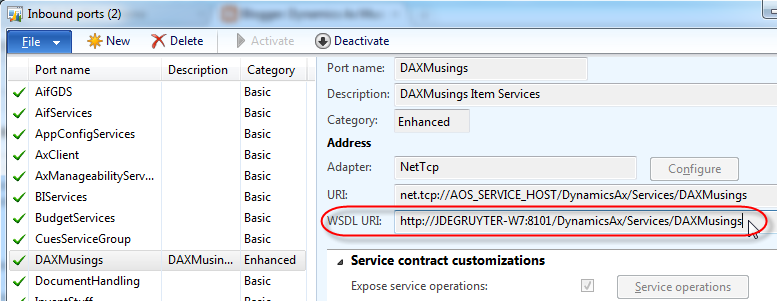
Now that the port is activated, the URL for the WSDL will appear on the screen. Write this down or copy to clipboard, we will need this later on to test the port!
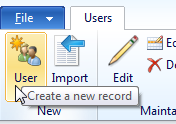
So, since we are assumed to be authenticating users outside of AX, we still need a way to setup valid AX users that don’t actually have a domain login. Go to System Administration > Common > Users and click the “User” button to create a new user.
In the “User ID” field you give the user a unique AX user id name or number. You are restricted to 8 characters there. For the “Account Type”, select “Claims user” (this indicates a non-domain user outside of AX!). The User Name field is not really important for the authentication process, but this should be the full name. Set the default company for the user. The two remaining fields, “Network domain” and “Alias” are the important ones. The network domain field for a claims user needs to be filled out, and you should put in the name of the authentication provider. It sounds more like a best practice though, you can really fill in whatever you want. For the alias, this is the actual username that will be used to log on. For a lot of authentication services these days, an email address is used, so I decided for this example to use network domain (aka provider) “DaxMusingsAuth” and alias “[email protected]” (being fully aware email addresses are not case sensitive, but it looks nice, don’t you think?).
After (!) the fields are field in, the only thing that remains is to enable the user!
The observant reader my have noticed I did not assign any roles to this claims user. And in fact, the sneaky blogger that I am, I did this on purpose! Your trusted intermediary (yourself) will have access to read the item, but this new claims user will not… This will show our calling code is actually executed as the claims user, and I also hope that proves the point that using claims users instead of just one administrator user, has clear security benefits.
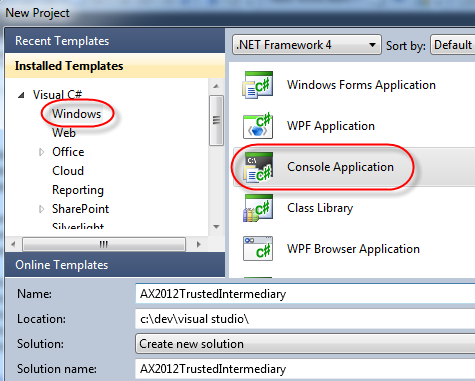
So, to test this out, we’ll create a quick console app and pretend to be [email protected]. Open Visual Studio 2010 and create a new project of type Console Application.
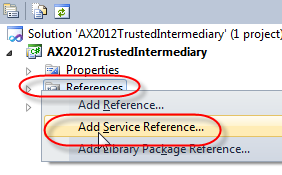
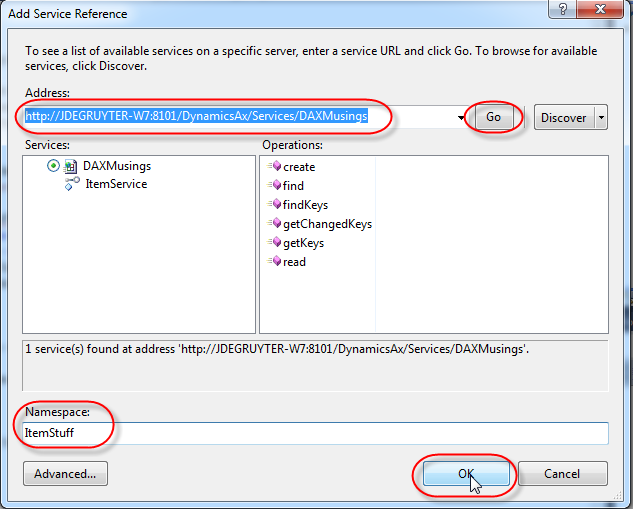
In your solution explorer, right-click the “References” node and select “Add Service Reference”. Enter or paste in the WSDL url from the inbound port we created earlier, and click “Go”. As a Namespace I decided to put in “ItemStuff”.
Click OK to generate the service proxies. Almost there! First we’ll ask the user to enter his username, next to enter an item number to lookup.
<pre>Console.Write("Enter username: ");
            string username = Console.ReadLine();
            Console.Write("Enter item number to look up: ");
            string itemnumber = Console.ReadLine();
</pre>
Next, we’ll create our service client to call the service, and provide the call context. The call context is where the magic happens! We specify the company, a unique message id for this call into AX (just create a quick GUID on the fly), and we pass in the user we wish to impersonate, in this case the username that was entered on the console. Note that similar to an AD username, we need to provide the provider name we filled out in the “network domain” field (I used DAXMusingsAuth), a backslash (escaped inside a string so \ in this case), and then the username.
<pre>ItemStuff.ItemServiceClient client = new ItemStuff.ItemServiceClient();
            ItemStuff.CallContext context = new ItemStuff.CallContext();
        context.Company = "CEU";
        context.MessageId = Guid.NewGuid().ToString();
        context.LogonAsUser = String.Format("DAXMusingsAuth\\{0}", username);
</pre></code>
Next we fill out the entitykeylist for the item we want to lookup, and call the service, outputting any exceptions to the console. I call ReadLine() at the end to prevent the console app from closing right away.
ItemStuff.EntityKey[] entityKey = new ItemStuff.EntityKey[1];
            entityKey[0] = new ItemStuff.EntityKey();
            entityKey[0].KeyData = new ItemStuff.KeyField[1];
            entityKey[0].KeyData[0] = new ItemStuff.KeyField();
            entityKey[0].KeyData[0].Field = "ItemId";
            entityKey[0].KeyData[0].Value = itemnumber;

            try
            {
                ItemStuff.AxdItem item = client.read(context, entityKey);

                if (item.InventTable.Length > 0)
                {
                    Console.WriteLine(item.InventTable[0].NameAlias);
                }
            }
            catch(Exception ex)
            {
                Console.WriteLine(ex.Message);
            }

            Console.ReadLine();
</code>
To see the full code, click here. That’s it! Run the code, enter username [email protected] and see what happens!
You will actually get a message that the access is denied. Feel free to try a non-existent username, and you should see a “logon failed” message.
If you want to see this work for sure, feel free to add your claims user to the system administrator or other role with access. Here’s my output:
If you enabled logging on your inbound port, you can check the logs in System Administration > Periodic > Services and Application Integration Framework > History and on the “Details” tab you will notice the “Endpoint user” showing your claims user id, and the “Submitting user” showing the trusted intermediary user.
There is no comment section here, but I would love to hear your thoughts! Get in touch!
Blog Links
Blog Post Collections
- The LLM Blogs
- Dynamics 365 (AX7) Dev Resources
- Dynamics AX 2012 Dev Resources
- Dynamics AX 2012 ALM/TFS
Recent Posts
-
GPT4-o1 Test Results
Read more... -
Small Language Models
Read more... -
Orchestration and Function Calling
Read more... -
From Text Prediction to Action
Read more... -
The Killer App
Read more...
 Menu
Menu
